Navigation
안드로이드 Jetpack의 네비게이션은 기존의 액티비티와 프래그먼트 사이의 복잡한 코드 구성을 간결하게 바꿀 수 있는 라이브러리이다. 또한 네비게이션 그래프를 통해 화면간의 구조를 시각화해서 볼 수 있다는 것도 큰 장점이다.
project 단위의 gradle
// Top-level build file where you can add configuration options common to all sub-projects/modules.

buildscript {
    ext.kotlin_version = '1.3.71'
    ext.navigation_version = '2.2.0-rc04' //새로 추가
    repositories {
        google()
        jcenter()

    }
    dependencies {
        classpath 'com.android.tools.build:gradle:3.6.3'
        classpath "org.jetbrains.kotlin:kotlin-gradle-plugin:$kotlin_version"

        //새로 추가
        classpath "androidx.navigation:navigation-safe-args-gradle-plugin:$navigation_version"
    }
}
...
app 단위의 gradle
apply plugin: 'com.android.application'
apply plugin: 'kotlin-android'
apply plugin: 'kotlin-android-extensions'
apply plugin: "androidx.navigation.safeargs.kotlin" //새로 추가

android {...}

dependencies {
    def fragment_version = '1.2.0-rc04'
    def nav_version = "2.2.0-rc04"

    ...

    //fragment
    implementation "androidx.fragment:fragment-ktx:$fragment_version"
    implementation "androidx.fragment:fragment-testing:$fragment_version"

	//navigation
    implementation "androidx.navigation:navigation-fragment-ktx:$nav_version"
    implementation "androidx.navigation:navigation-ui-ktx:$nav_version"
}
1. Fragment 생성
화면 변환을 위한 fragment 3개를 생성하고, 각 프래그먼트 안에는 프래그먼트 넘버를 나타내는 텍스트뷰만 배치할 것이다.


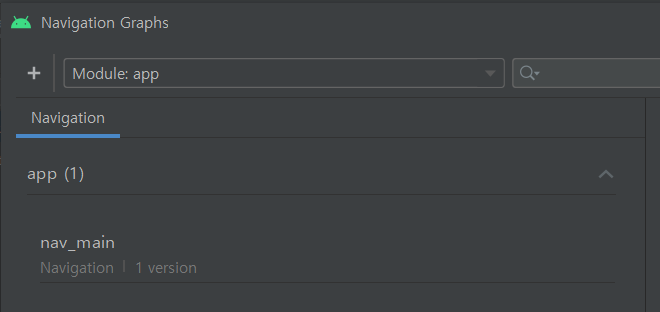
2. Navigation 리소스 만들기
먼저 리소스 폴더에 navigation 리소스 폴더를 생성한다. 그리고 그 안에 nav_main.xml을 생성한다.


생성한 nav_main.xml을 들어가면 아래와 같이 새로운 destination을 만들라고 한다.

위를 클릭하고 아래와 같은 창이 나오면 fragment를 눌러 추가해준다.


3. NavigationController 추가
activity_main.xml에 NavHostFragment를 찾아서 간단하게 추가할 수 있다.

4. BottomNavigationView 구현
<?xml version="1.0" encoding="utf-8"?>
<LinearLayout xmlns:android="http://schemas.android.com/apk/res/android"
    xmlns:app="http://schemas.android.com/apk/res-auto"
    xmlns:tools="http://schemas.android.com/tools"
    android:orientation="vertical"
    android:layout_width="match_parent"
    android:layout_height="match_parent"
    tools:context=".MainActivity">

    <fragment
        android:id="@+id/fragment"
        android:name="androidx.navigation.fragment.NavHostFragment"
        android:layout_width="match_parent"
        android:layout_height="0dp"
        android:layout_weight="1"
        app:defaultNavHost="true"
        app:navGraph="@navigation/nav_main" />

    <com.google.android.material.bottomnavigation.BottomNavigationView
        android:id="@+id/main_bottom_navigation"
        android:layout_width="match_parent"
        android:layout_height="wrap_content"
        app:menu="@menu/menu_bottom_navigation" />

</LinearLayout>
위처럼 BottomNavigationView를 activity_main.xml에 추가해주면 마지막 app:menu에 에러가 표시될 것이다. 그러면 menu에 menu_bottom_navigation을 추가해준다. (navigation을 만들 때와 같은 방식)


그리고 menu_bottom_navigation.xml을 다음과 같이 수정한다. id는 네비게이션에 존재하는 fragment의 id와 같은 값을 주어야 한다.
<?xml version="1.0" encoding="utf-8"?>
<menu xmlns:android="http://schemas.android.com/apk/res/android">

    <item
        android:id="@id/firstScreen"
        android:icon="@drawable/ic_folder"
        android:title="@string/title_menu_first" />

    <item
        android:id="@id/secondScreen"
        android:icon="@drawable/ic_folder"
        android:title="@string/title_menu_second" />

    <item
        android:id="@id/thirdScreen"
        android:icon="@drawable/ic_folder"
        android:title="@string/title_menu_third" />
</menu>
icon은 drawable 폴더에 적절한 이미지를 추가하고 그에 맞는 이름으로 설정한다. 마지막으로 title은 values의 string.xml에 추가해주면된다.
5. Activity에서의 세팅
먼저 setContentView 밑에 다음 코드를 추가한다.
NavigationUI.setupWithNavController(main_bottom_navigation, findNavController(R.id.fragment))
NavigationUI.setupWithNavController은 View와 NavigationController를 매개변수로 받아 View를 NavigationController에 맞게 구현된다. 이 과정에서 bottomNavigation의 menu값의 id와 fragment 목적지가 자동으로 매핑된다.
NavigationController는 생성한 내비게이션 그래프에 맞게 NavHost 내부가 구현되도록 도와주는 객체이다.
6. Fragment의 세팅
여기서는 간단하게 화면전환이 잘되고 있음을 보여주도록 각 프래그먼트 별로 서로 다른 text를 가진 textView를 추가해준다.
<?xml version="1.0" encoding="utf-8"?>
<FrameLayout xmlns:android="http://schemas.android.com/apk/res/android"
    android:id="@+id/thirdScreen"
    xmlns:tools="http://schemas.android.com/tools"
    android:layout_width="match_parent"
    android:layout_height="match_parent"
    tools:context=".fragments.ThirdFragment">

    <TextView
        android:layout_width="match_parent"
        android:layout_height="match_parent"
        android:text="ThirdFragment"/>

</FrameLayout>
결과
아래의 버튼을 클릭하면 정상적으로 프래그먼트가 이동되는 모습이다.


'안드로이드 > JetPack' 카테고리의 다른 글
| [안드로이드] Paging Library 개요 (0) | 2020.12.31 |
|---|---|
| [안드로이드] 8. Navigation 심화 (0) | 2020.08.10 |
| [안드로이드] 6. DataBinding (0) | 2020.08.10 |
| [안드로이드] 5. ViewModel을 이용하여 UI와 로직을 분리 (0) | 2020.08.10 |
| [안드로이드] 4. Room 비동기처리 (feat. Coroutine) (0) | 2020.08.09 |


